Welcome back. When last we left our staffel, two of its six pilots had died, and three of the remaining pilots had sustained hits to their aircraft on the sole attack run they’d made against the bomber formation. Will they succumb to these assaults upon their person? Stay tuned.
Turn 3: Recovery
Being in the Return boxes of the board, the only action any of my pilots can take is Recovery, which takes place a few phases down the line, or Exit. Dahl, whom you may remember is Out of Ammo after the attack run thanks to his draw from the attack deck, but being undamaged, exits the mission, his ability to do anything from here on out being pretty much zero. Best not to hang around and die, then.
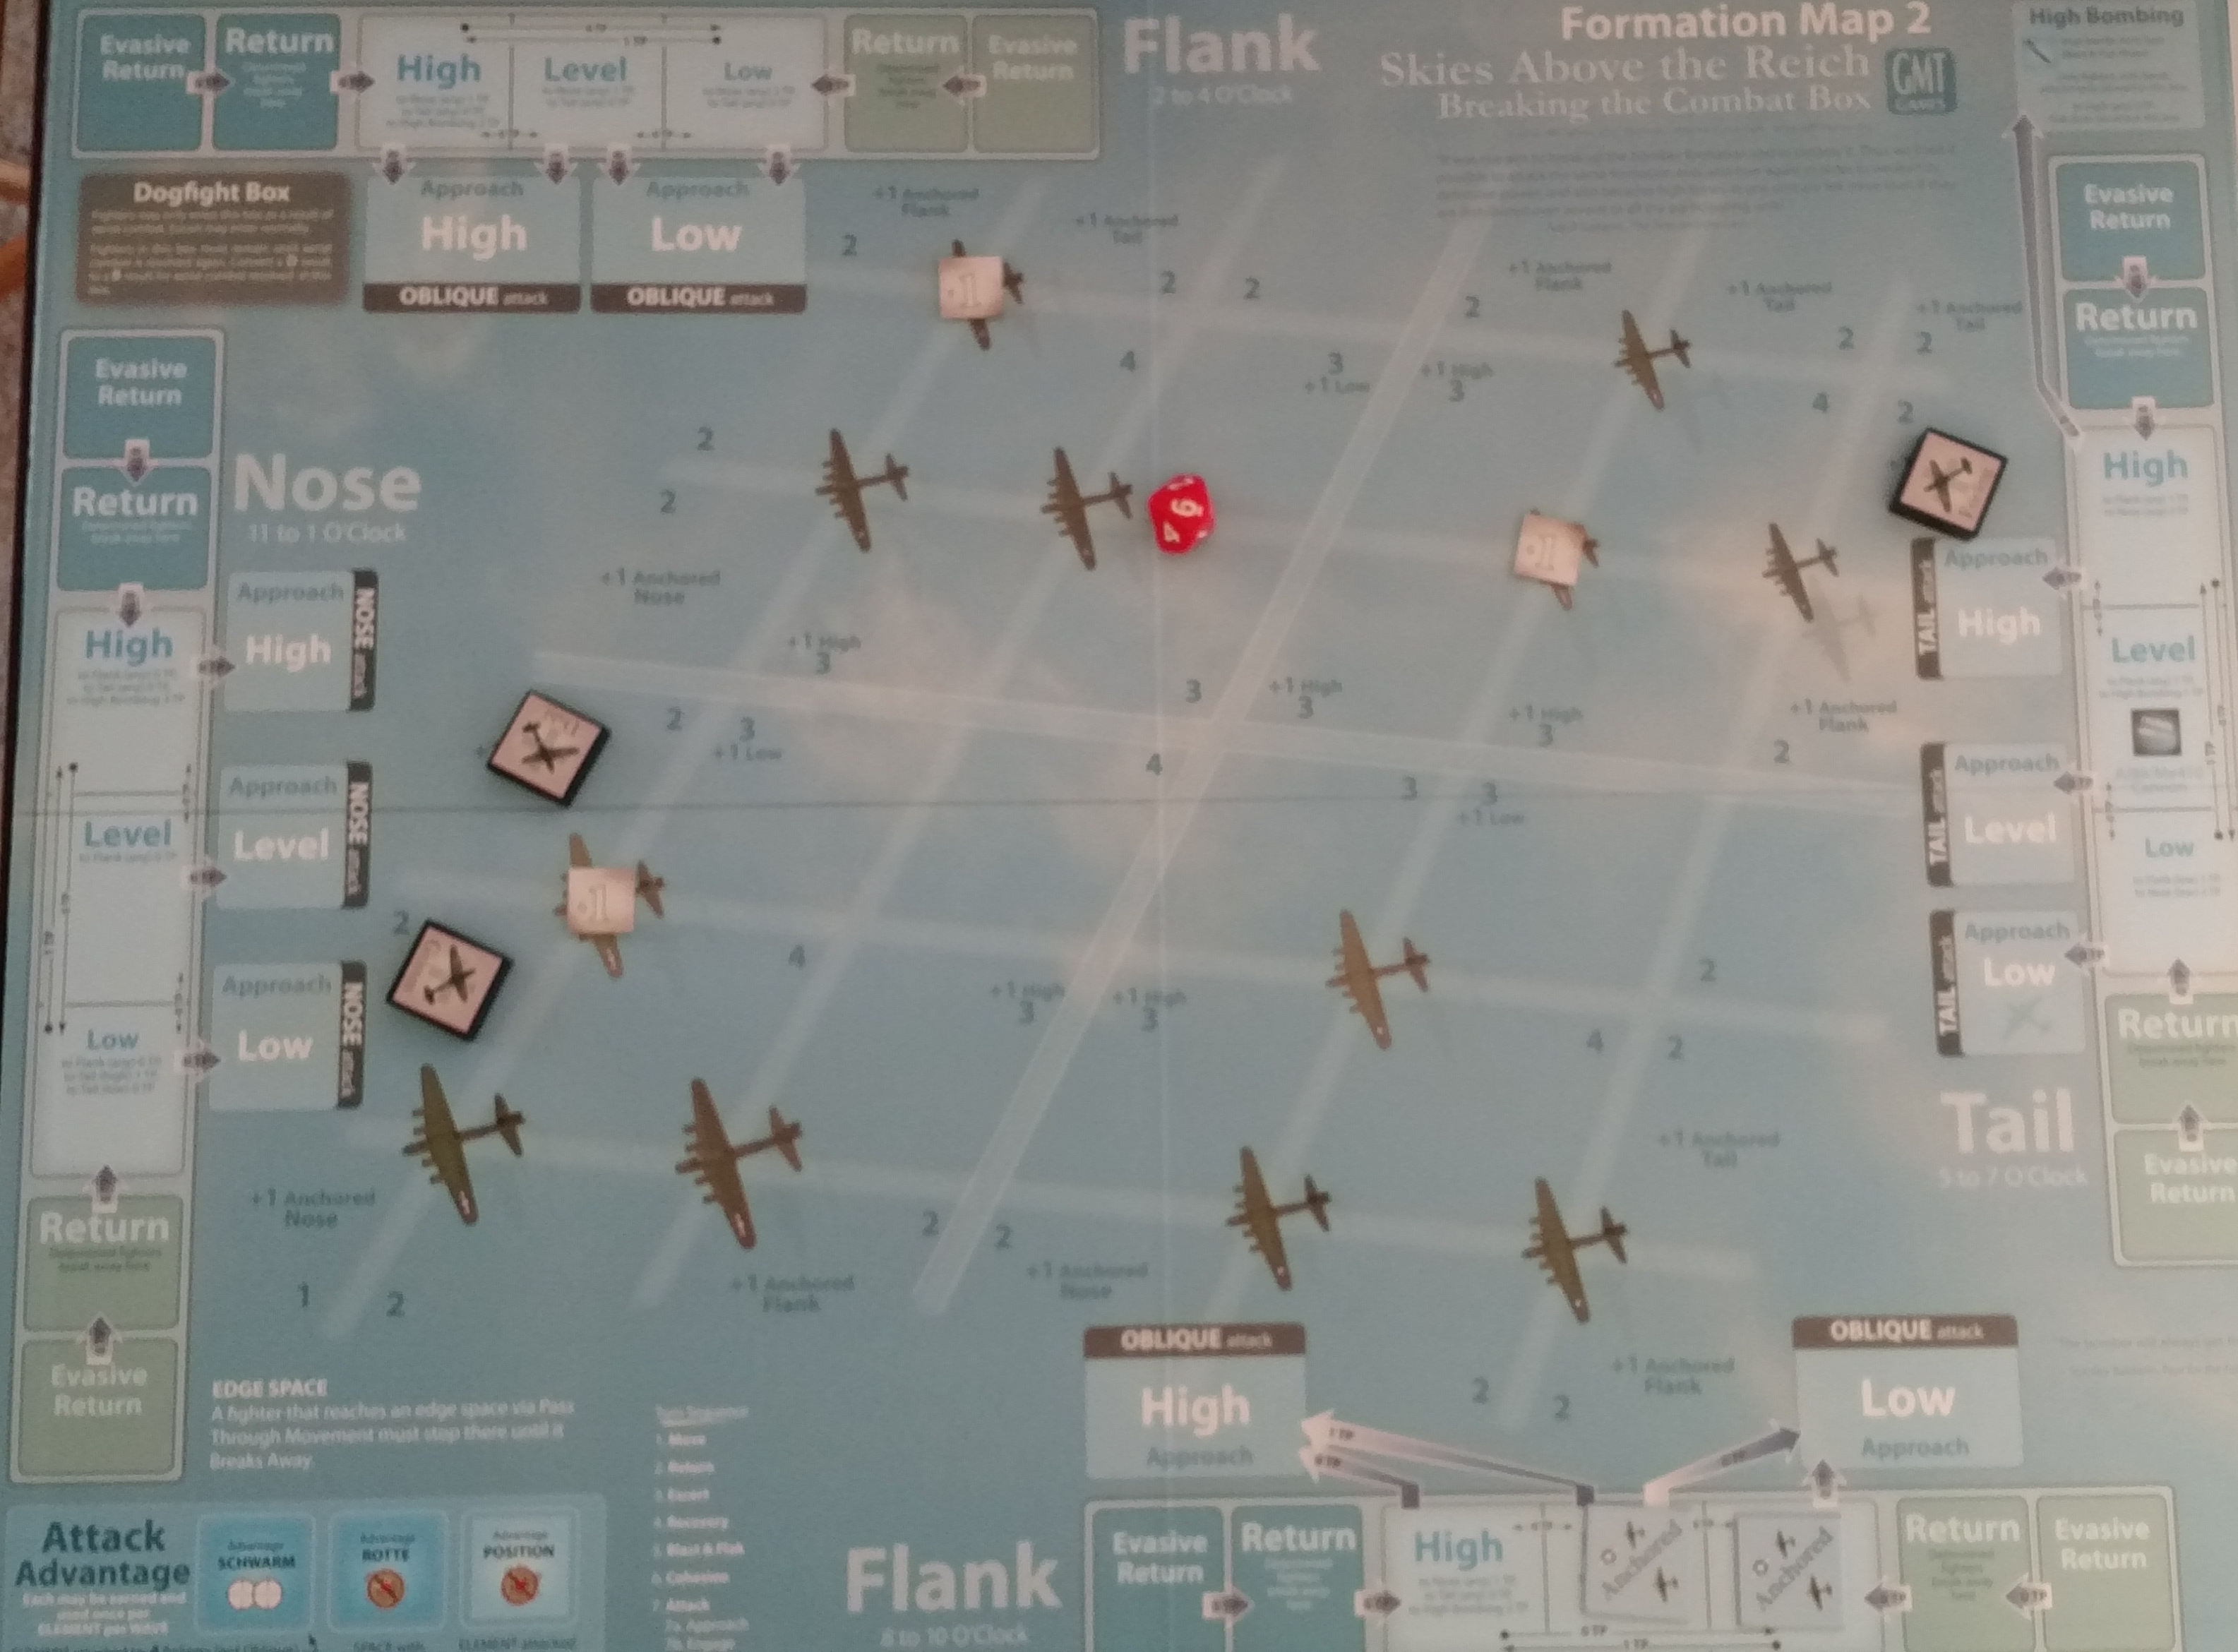
As for the other three, they are prevented from exiting by their hit markers, which are resolved during the recovery phase. For each hit on each fighter, you roll the included d10. If the result is greater than or equal to the number on the hit marker, the hit is trivial and they shrug it off. If, however, it is under, bad things happen. Frieling rolls a 6, and his hit is trivial. Clade rolls a 3, meaning his cockpit hit is serious, so he is moved to the appropriate Fate Box on the card. Grimm likewise rolls a 3, meaning his elevator hit is serious, and he likewise shuffles off to the corresponding Fate Box. On the bright side, the bomber element fails its cohesion check (add up all the markers assigned to the element, like damage markers and Fallen Out or Destroyed markers, roll a d10, and if the roll is under the number of markers the formation suffers a loss of cohesion, otherwise it may gain cohesion) and goes to Element Loose, which imposes a blanket -1 penalty to its Lethal Level. The turn is now over.
Turn 4: One Last Pass
Frieling is the only fighter left on the board, everyone else either dead, gone home or in the process of trying to go home. He is filled with determination and decides to make one last pass at the bomber his compatriots paid so dear a price to damage so very little. He moves from the Return box to the High box on the 8-10 o’clock flank, which puts him in the sun. If you attack from the sun (or move into the sun during the Continuing Fire portion of the Attack phase) you can cancel one hit result against your fighter from the card pull. That can only help. The element once again fails its cohesion check, putting it at Kaputt (-2 to Lethal Level). Things are looking ever so slightly up.
Turn 5: For All the Marbles
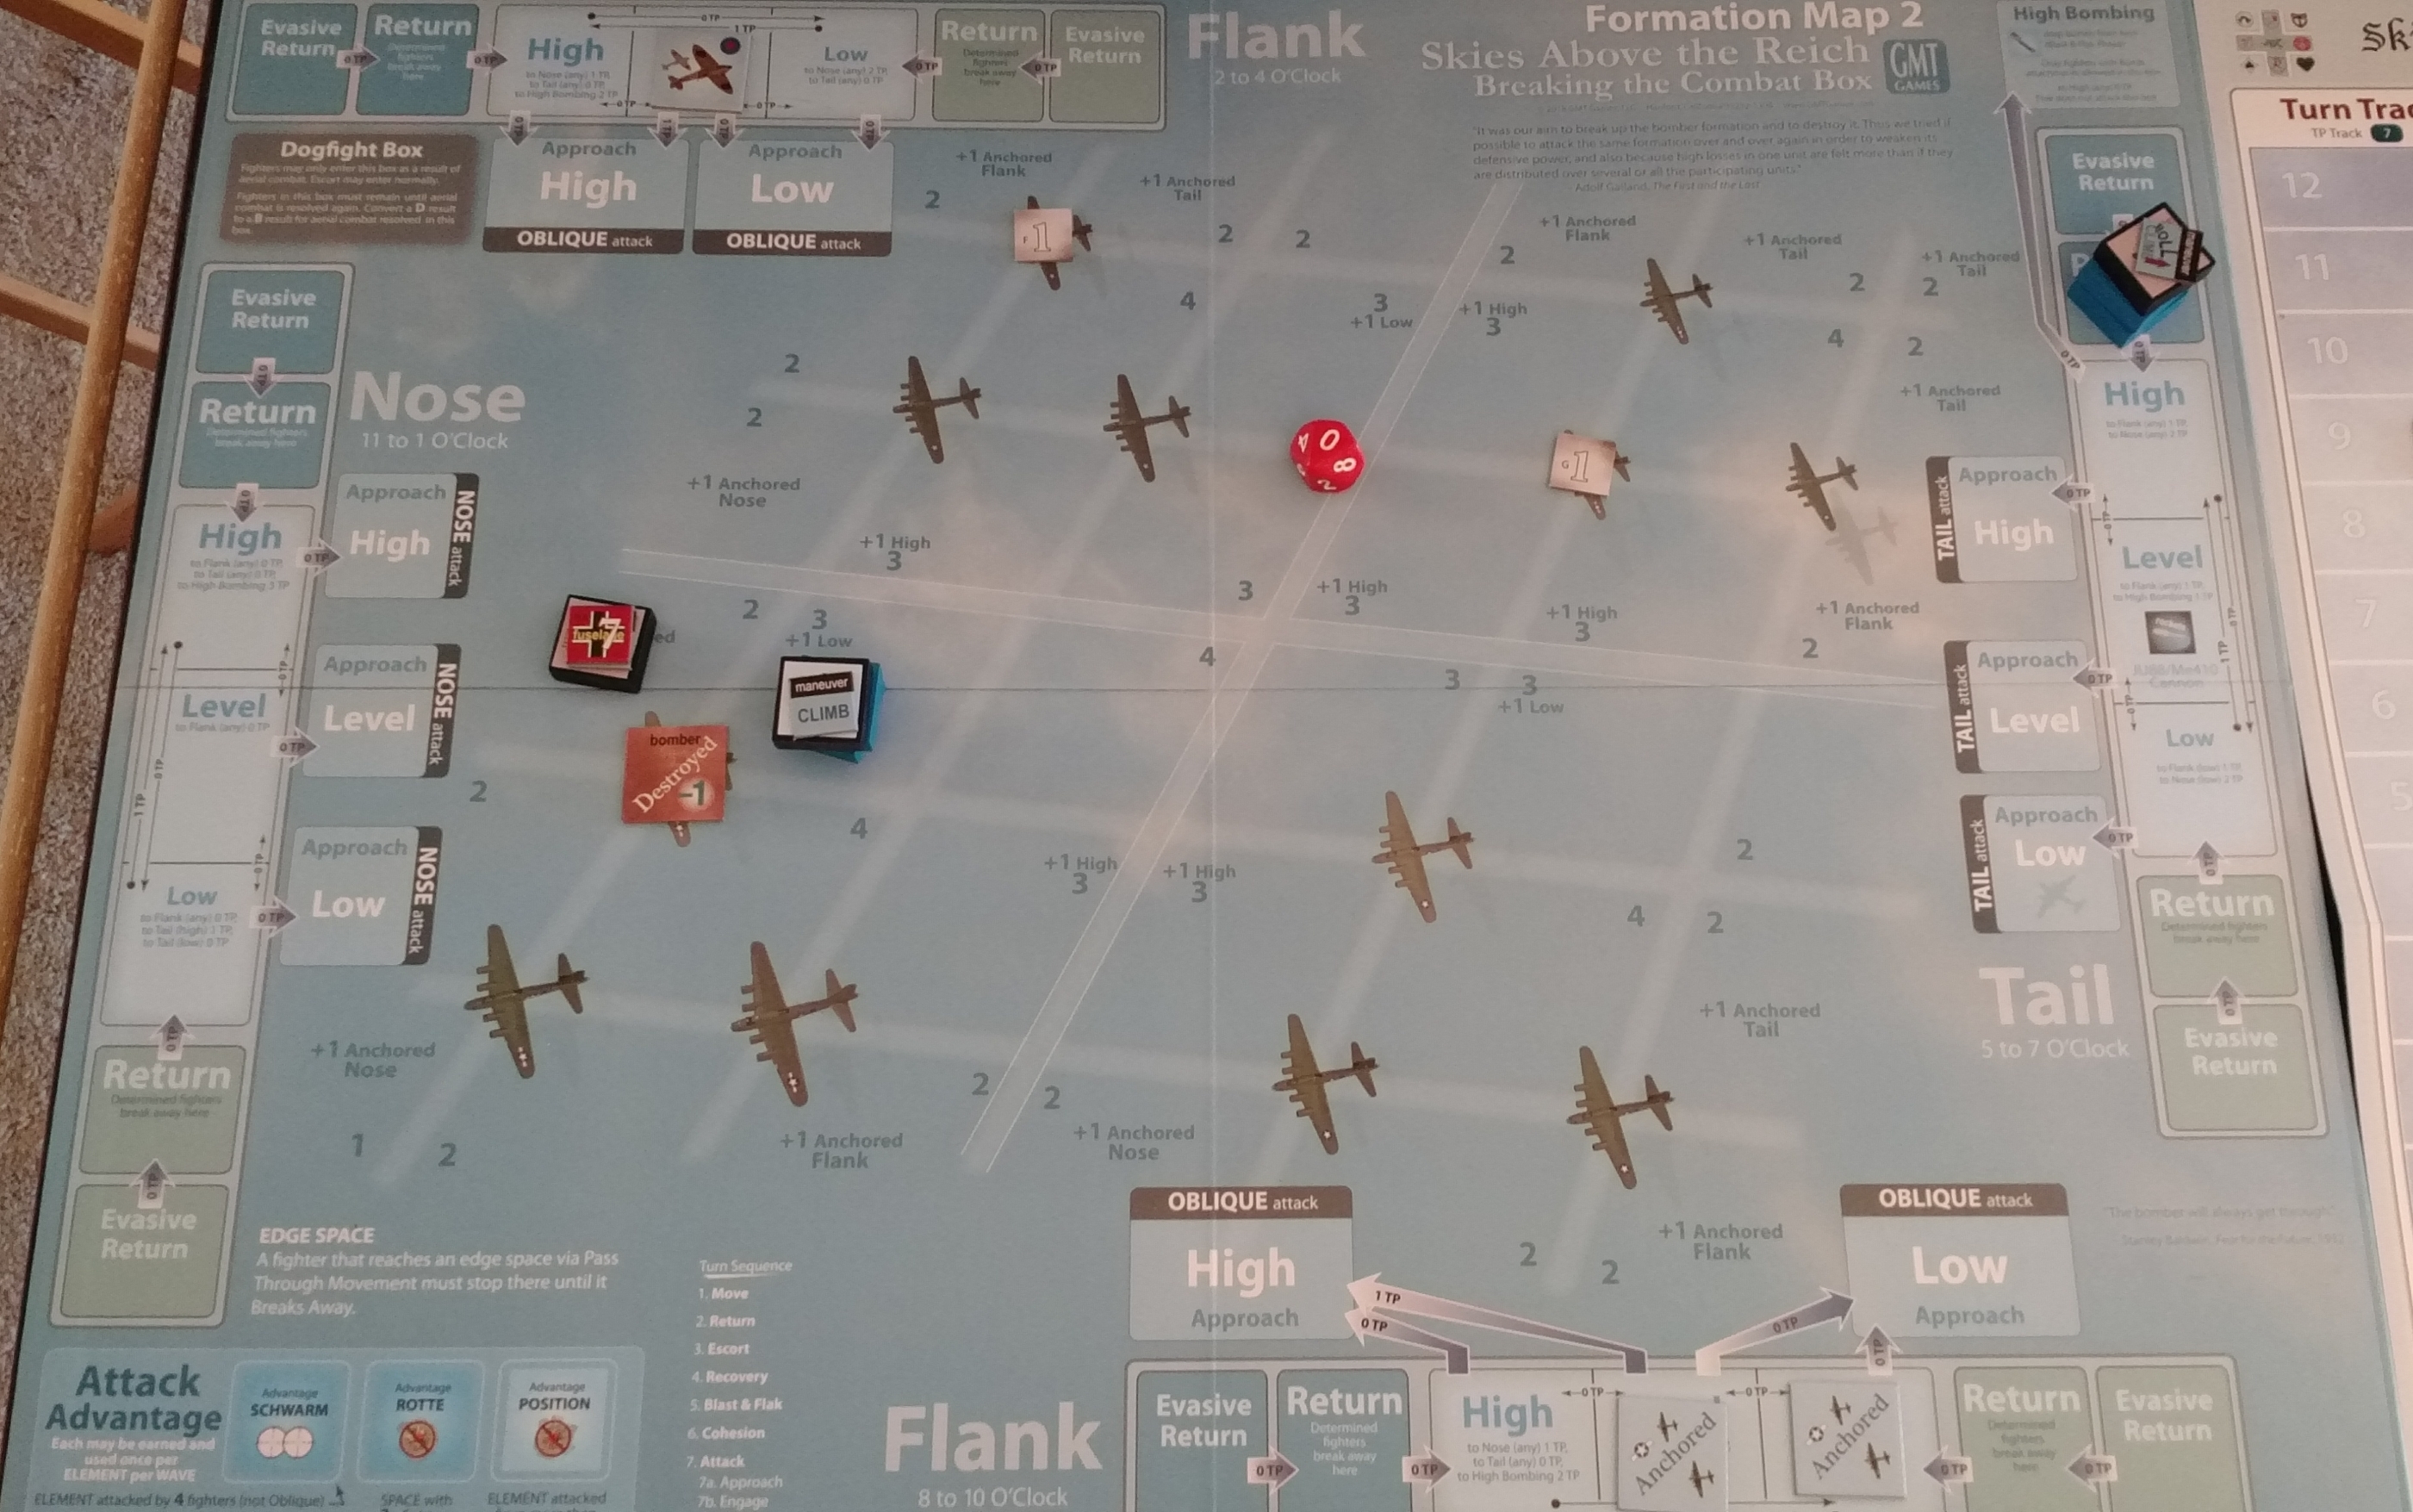
Frieling moves to the High Oblique approach box, committing to the attack. The element passes its cohesion check (boo), moving back to Element Loose. Frieling moves to the Nose attack spot in front of the lead bomber once again. In the image below, you can see a couple of new components: the little sun marker on top of the fighter as a reminder that he attacked out of the sun as well as the blue altitude blocks, two as a reminder that he attacked from the High position.
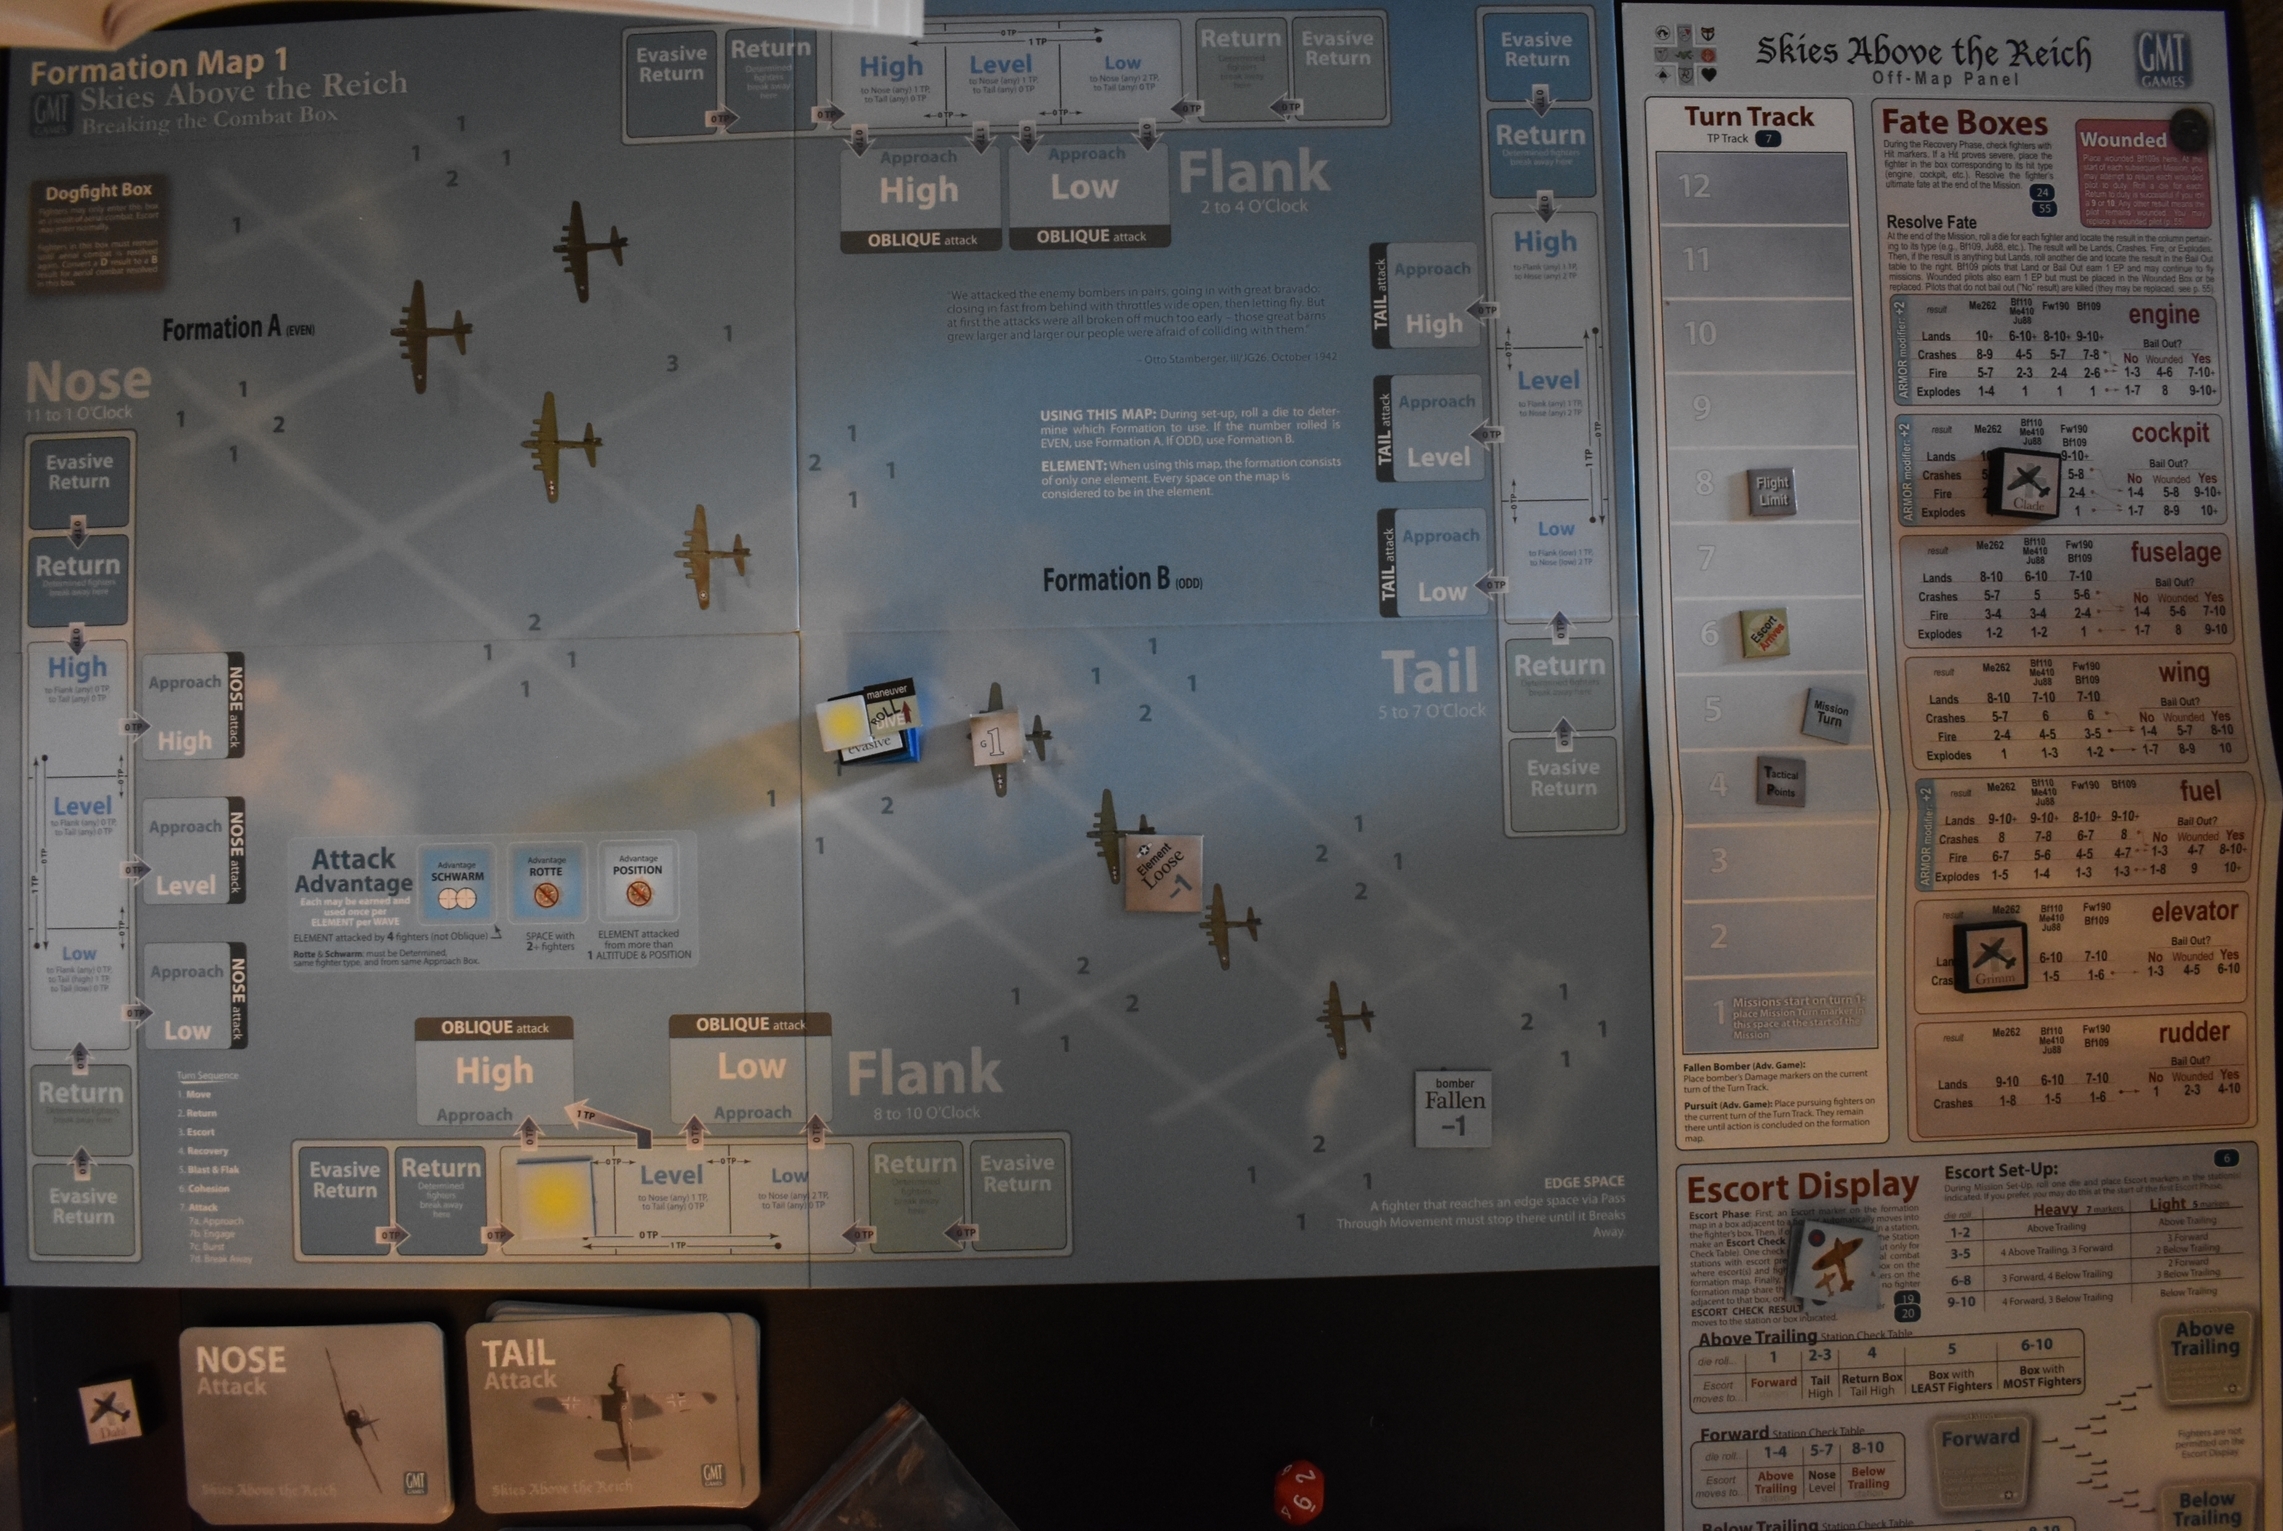
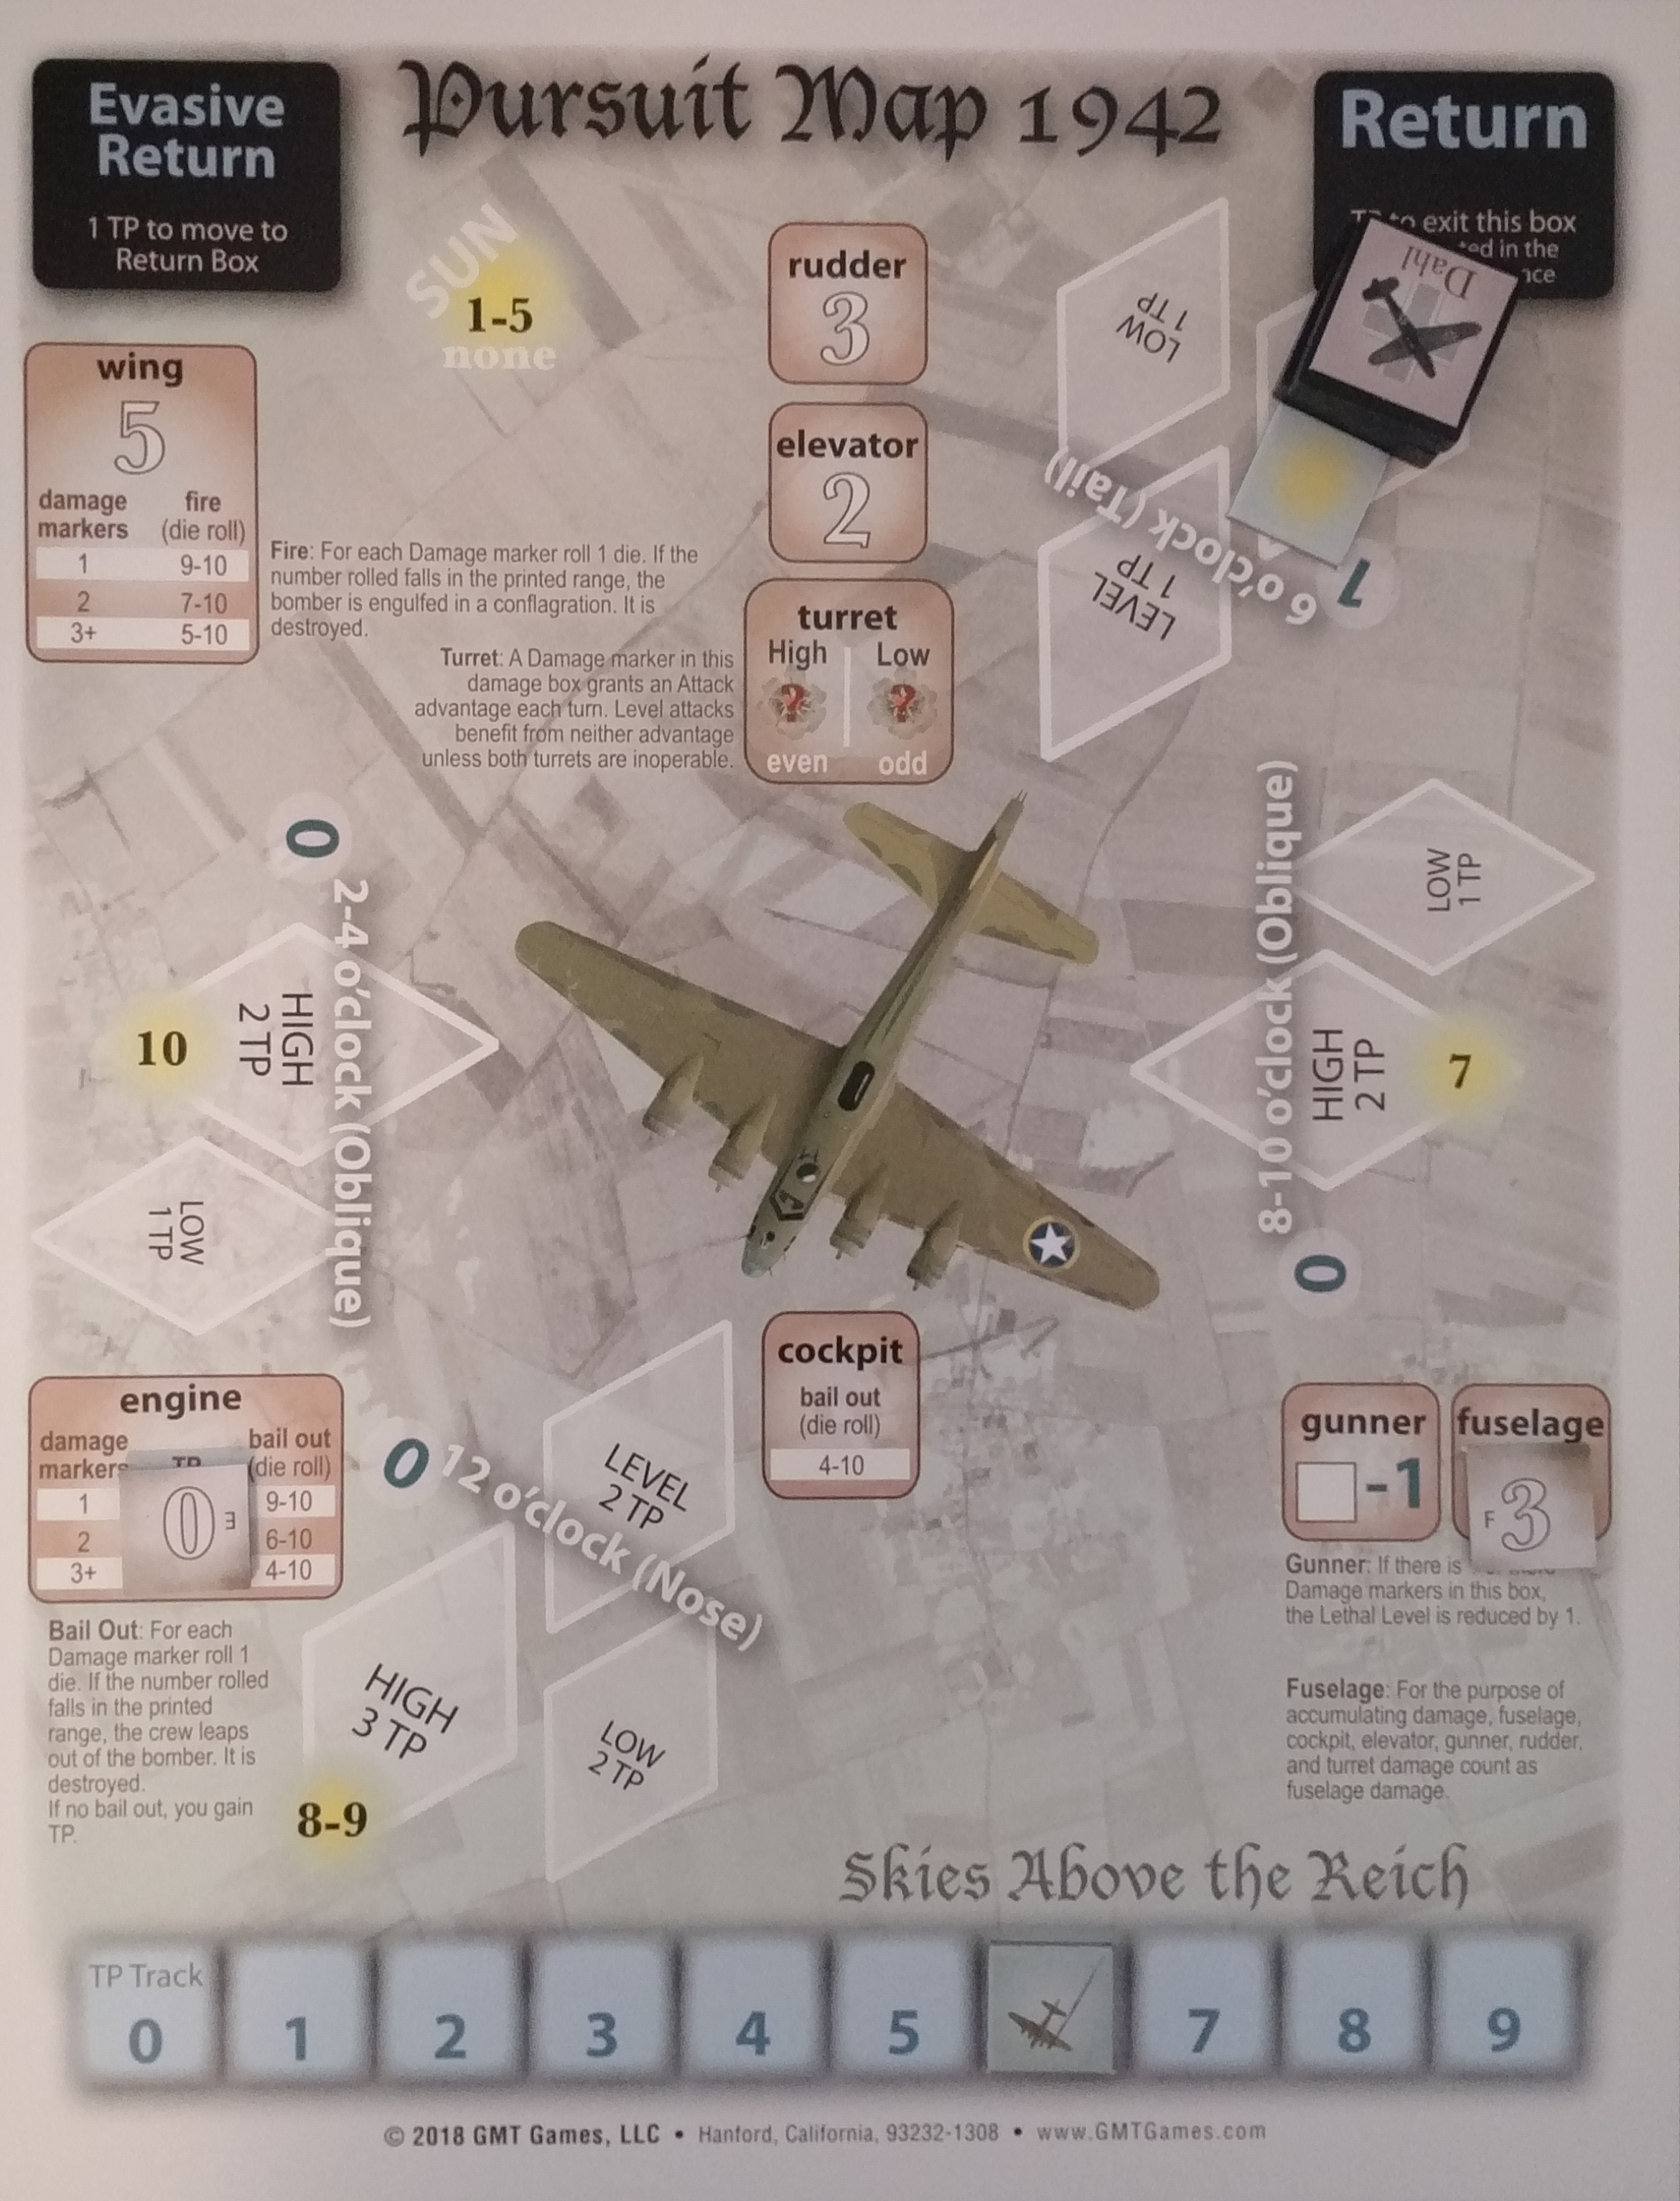
He has also chosen the Evasive mode, having seen what became of the staffel’s gallant attempt at being Determined. This will force him, after the pass, to enter the Evasive Return box rather than the regular Return box, which would impose an additional turn’s worth of downtime before he could make another pass. Or it would if he didn’t have the Break Anywhere experten skill, which allows you to do precisely what it says, which will come in handy in just a bit. He’s also chosen a dive roll toward the 2-4 o’clock flank as his maneuver, although this will prove to be irrelevant. Regardless. Approaching from the front, with the Element Loose penalty against the bombers, the Lethal Level is 0. The result from the Nose deck card for 0/High is Pass Through 1. No hits on either side. Bummer. Rather than pass to the top side (as viewed from our position looking at the board), he chooses to invoke Break Anywhere, which allows him to skip Continuing Fire and just go to a Return box, any one he chooses. This fight is over, now. He could get another pass in, but next turn the escorts will arrive, and there is only one of him, so on Turn 6 he wisely chooses to live to fight another day and exits. The mission is over.
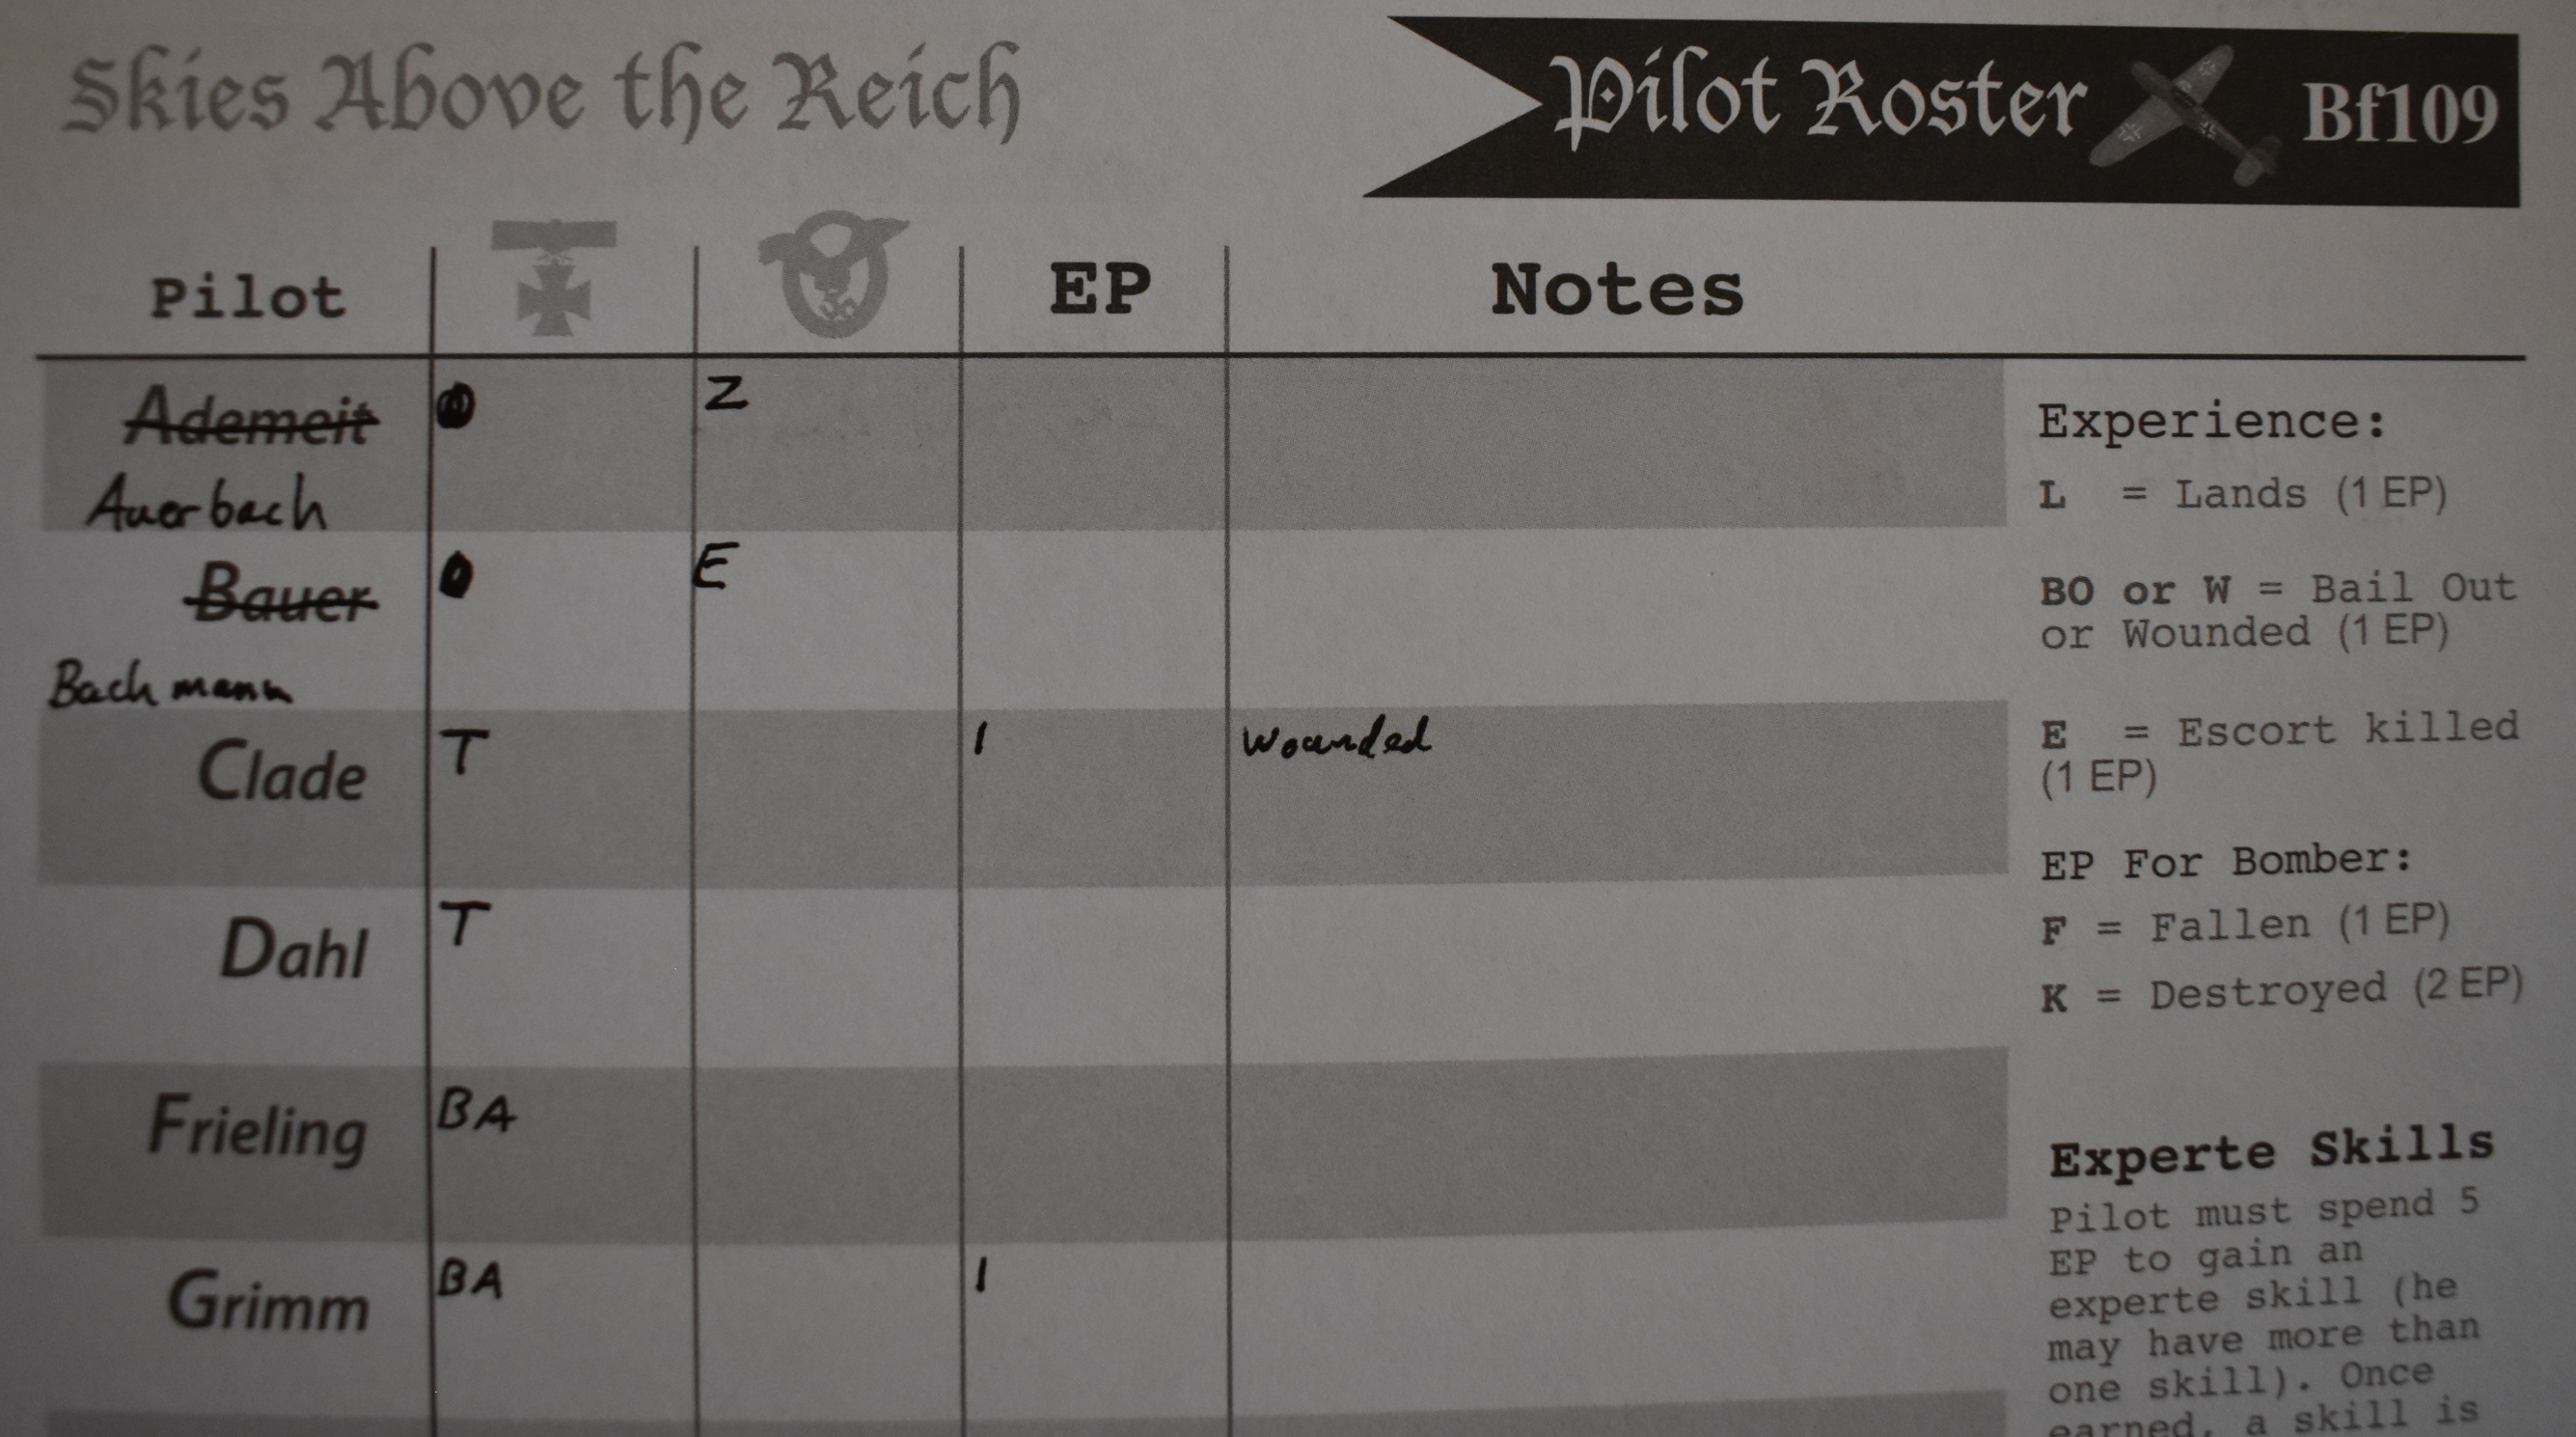
Now it’s time to resolve the Fates of Clade and Grimm. Clade rolls a 7 for his landing check and crashes. This prompts another roll, which is a 6, meaning he bails out but is wounded. He gains 1 experience point for surviving. Wounded means that before the next mission, if I roll a 9 or 10 he is back in action and can go on the mission. Any other result means he’s still cooling his heels in the infirmary, flirting with the nurses, no doubt. Grimm rolls a 9 for his Fate and lands, earning himself 1 EP in the process, which seems slightly unfair since he managed to bring his machine home. Regardless. Three lost planes means -3 Operations Points for next missions. I didn’t really go into that, but Operations Points are how you assign equipment to missions. For the first mission I had 6 OP and nothing to spend it on except for 6 Bf109s, which cost 1 OP each, so that was that. OP do not carry over from mission to mission. Next time I might be a little understaffed.
Below you can see my pilot roster. In accordance with the rules, I have crossed out the dead pilots’ names and replaced them with names of my choosing, sticking with the letters they originally had (I got them from a Wikipedia list of German surnames). So, Auerbach and Bachmann (I guess I just really like “bach”) join the staffel, and as replacement pilots they are both green, which means they get a Green penalty. Auerbach has “Zeal,” which means he must choose Determined as his mode rather than Evasive, and Bachmann gets Erratic, which means I have to spend 1 TP (tactics point, recall) for him during the Break Away phase (which comes after continuing fire and is how fighters get back to the edge of the board to make another run), or he immediately exits. That seems pretty harsh! I could at this time choose to replace Clade, my wounded warrior, as well, but you have to be careful with that sort of thing. I would get a sixth pilot immediately ready to go on a mission rather than having to roll for a wounded one, but he would also be green rather than an experte, and also if you lose a replacement pilot, that’s it, they can’t be replaced.
So, that’s the first mission over. The campaign is going to be a tough one, and at least this time around I’m not even going to use the optional “Staffel Erosion Table” rule, which simulates losses due to other types of missions that a staffel would have flown besides bomber formation attacks, and which the designers promise will, “make your campaign harder”. Not sure I need that at the moment. On my staffel record sheet, in the “Notes” column for this mission I have made the annotation, “total disaster,” which I think sums it up rather well.
So, that’s it for Mission #1! So far, I am really, really enjoying the game. It’s quick to set up, quick to tear down, it’s got a lot of flavor and I think there’s a really good decision space and also a great sense of narrative. Tune in next time to see how many more pilots I can get killed!